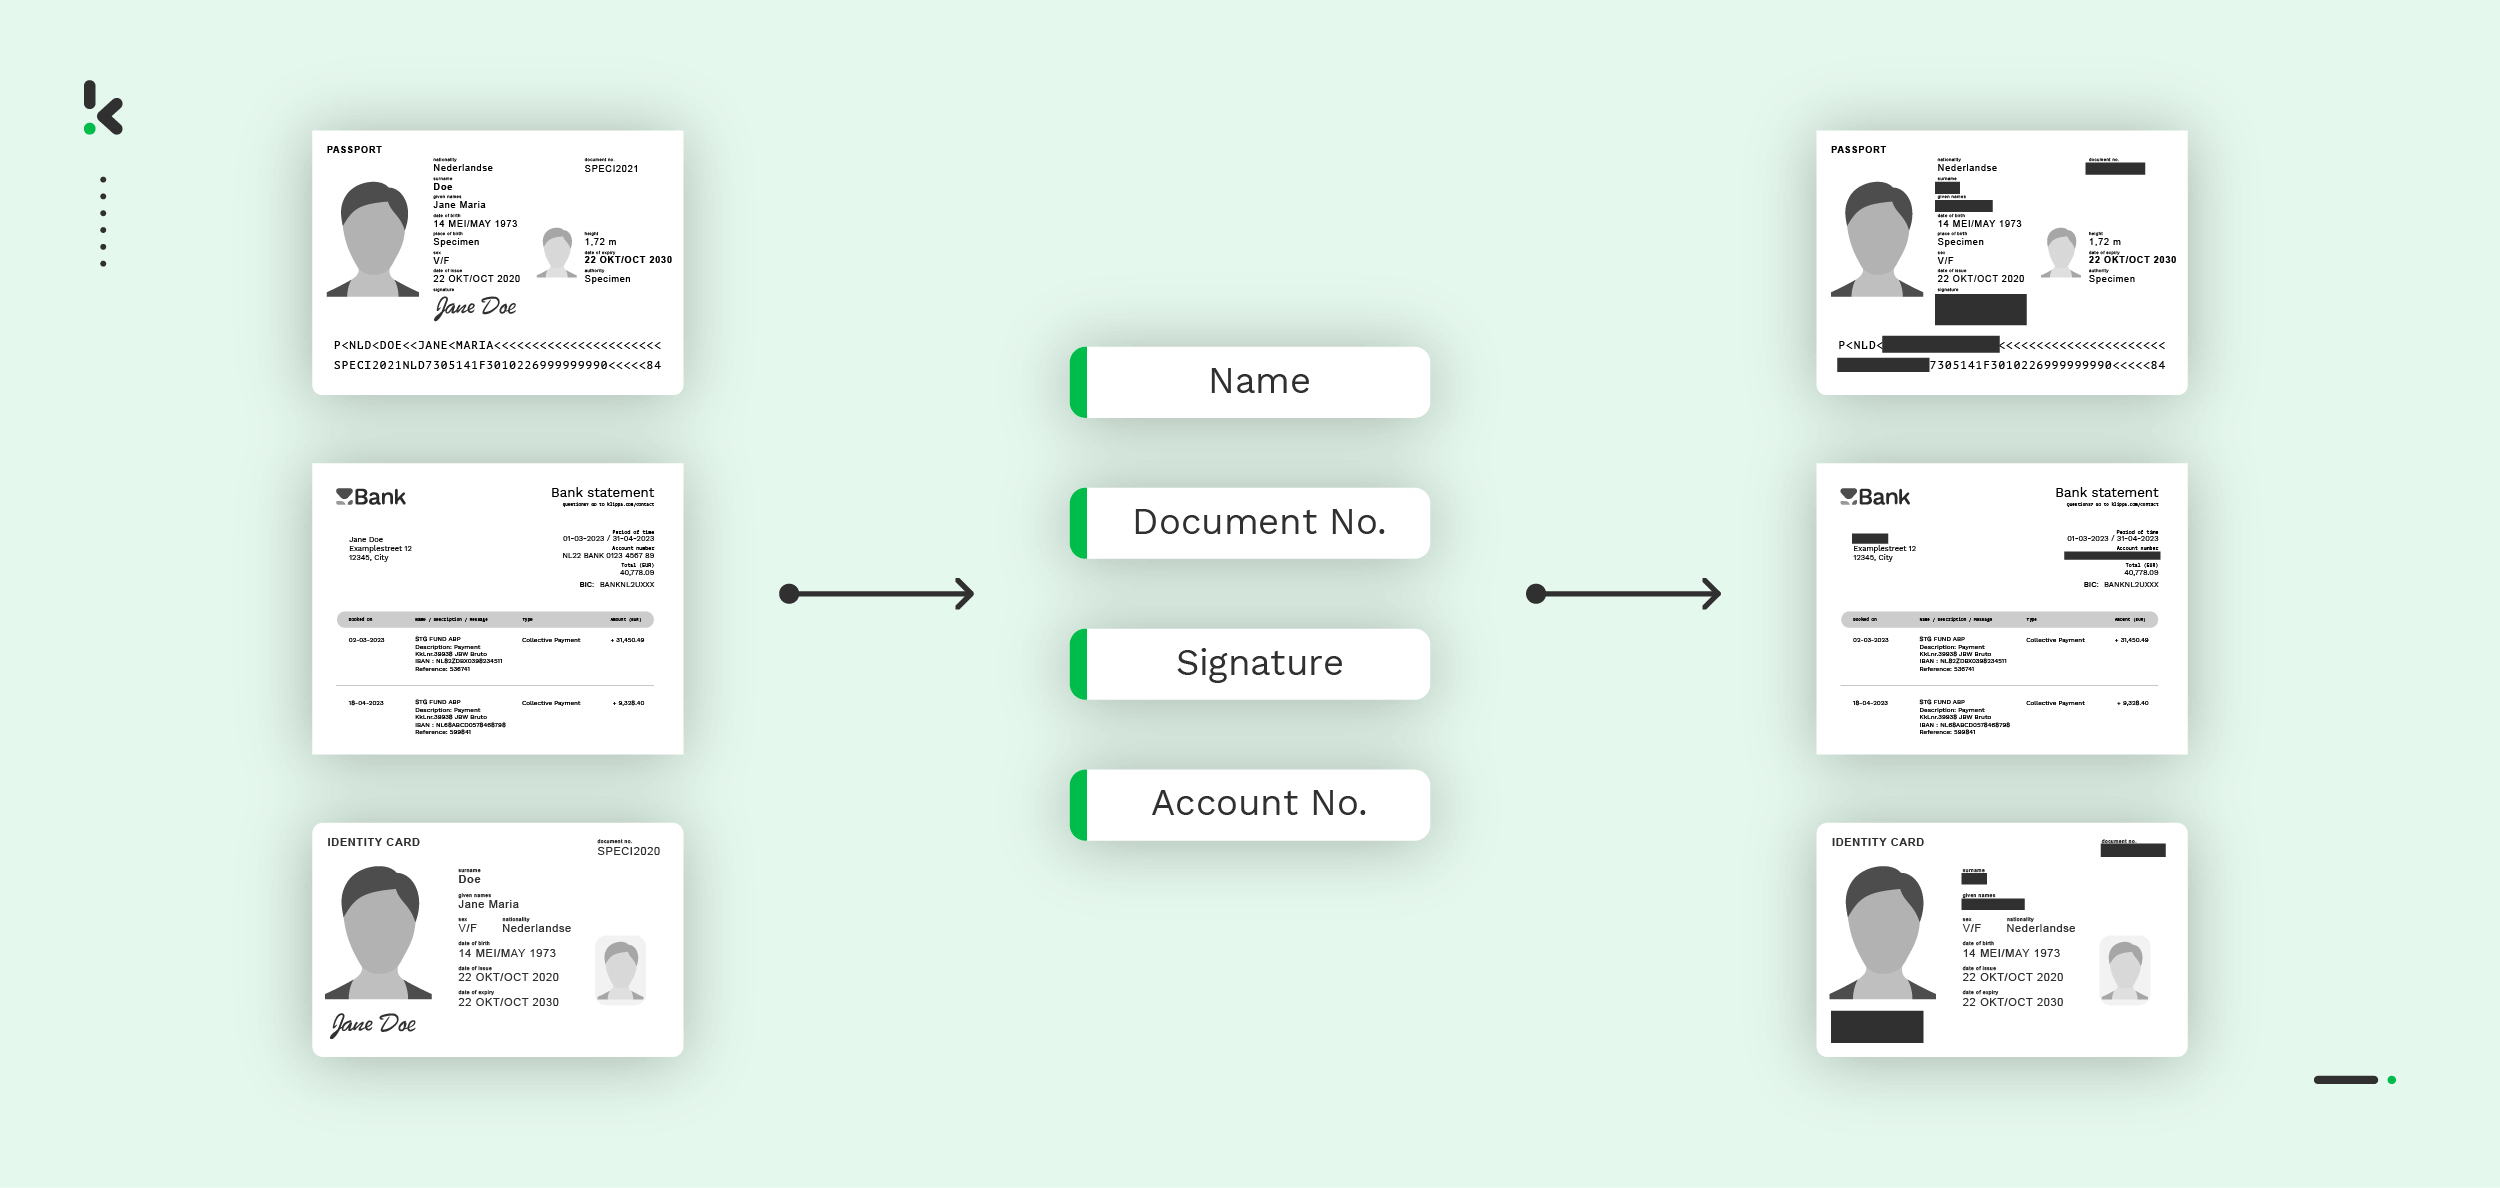

Privacy regulations and the GDPR are becoming stricter in addressing the increasing risks of handling sensitive information like financial transactions, medical records, and customer details. This makes the risk of non-compliance, data breaches, and misuse of personal information a growing concern.
A data breach in the business world doesn’t just mean heavy charges and legal issues but it can also severely harm your brand reputation and undermine customer loyalty. These negative consequences often lead to significant financial losses, slower growth, and, in some cases, the downfall of the company.
What’s the solution? Anonymization! Like every innovation, anonymizing data started with the traditional manual way. While this process is practical for small businesses, it’s still slow, prone to errors, and not suitable for handling big data.
That’s where bulk data anonymization comes in. By embracing automation and leveraging advanced tools and techniques, businesses can process large volumes of data efficiently, while protecting sensitive information and ensuring compliance.
This blog will explore the concept of bulk data anonymization, its benefits, how it works, and why it’s essential for businesses today. We’ll also look at tools that make anonymization simple, efficient, and compliant. Let’s get started!
What is Bulk Data Anonymization?
Data anonymization is the process of transforming personal data by removing or encrypting personally identifiable elements in a dataset. The goal is to protect people’s privacy while maintaining the data’s usability and credibility.
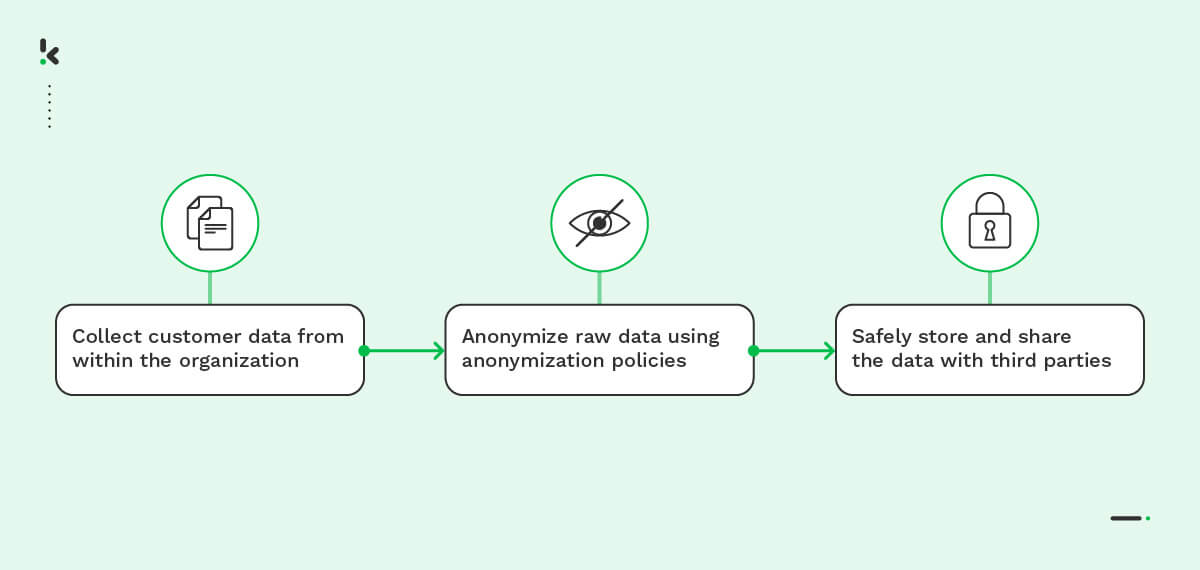

Here are the most commonly used techniques for anonymizing or removing sensitive data:
- Data Masking
- Pseudonymization
- Generalization
- Data Swapping
- Data Perturbation
- Synthetic Data Generation
If you want to dive deeper into these techniques, make sure to read our detailed blog on the topic here.
But how does bulk data anonymization differ from anonymizing a single document? Bulk data anonymization refers to the process of anonymizing large volumes of sensitive data stored in multiple datasets.
Since bulk data anonymization refers to large-scale datasets, understanding how it works is crucial for companies as it requires consistent application of techniques throughout the process. This process involves protecting sensitive information and safeguarding patterns that can reveal sensitive insights. Now, let’s explore why anonymizing documents in bulk is essential for companies.
Why Should You Anonymize Documents in Bulk?
As mentioned before, anonymizing data in bulk is more than just a convenience. It’s a necessity for businesses that handle large volumes of data. Below you’ll find a list of reasons:
Regulatory Compliance
Bulk anonymization helps businesses meet GDPR requirements, ensuring secure and responsible data handling.
Data Security
Anonymizing data minimizes the impact of breaches and unauthorized access, as the information becomes unusable to unauthorized parties.
Operational Efficiency
Saving time and resources is the inevitable result when automating the anonymization of large datasets. Especially, when comparing it to the manual method.
Scalability
Managing big data can be complex, which is why bulk anonymization is essential. It allows businesses to scale up or down efficiently without the need for additional resources, ensuring consistent protection regardless of data volume or complexity.
Ethical Data Use
By anonymizing sensitive information, businesses can leverage data for analytics, AI, or decision-making without compromising privacy.
Increased Trust and Reputation
Proactively anonymizing data ensures customer loyalty and preserves the brand’s reputation.
How to Anonymize Documents in Bulk?
Having highlighted all the benefits above, it’s now clear how bulk document anonymization can positively impact your operations. At Klippa, our purpose is to automate administrative tasks and workflows, ensuring a smoother and worry-free experience.
Below, we’ll go through the steps on how the Klippa DocHorizon Platform can help you deal with bulk document anonymization. Please note that in this example, we’ll use identity documents such as ID cards, passports, and driving licenses. However, this process can easily be applied to any document type.
Let’s walk you through the process step by step.
Step 1: Sign up on the platform
First, you must sign up for free on the DocHorizon Platform by entering your email address and password. Provide details like full name, company name, use case, and volume; then you’ll receive a free credit of €25 to explore all the platform’s features and capabilities.
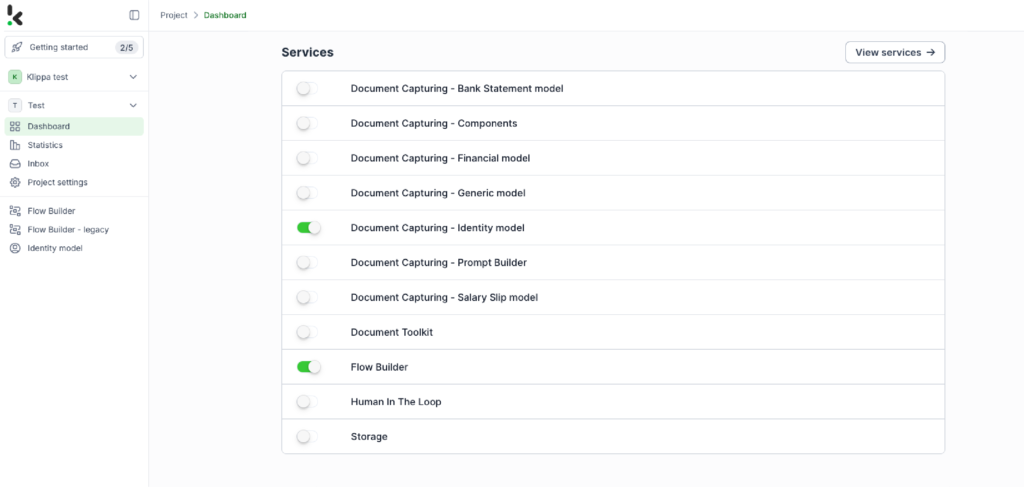
After logging in, create an organization and set up a project to access our services. To begin with your goal of anonymization, simply enable the Identity Model service. This setup provides you with all the features you need to get started right away!

Step 2: Create a preset
The Identity Model simplifies document identification and anonymization by automatically extracting important data, masking sensitive information, and ensuring compliance with privacy regulations.
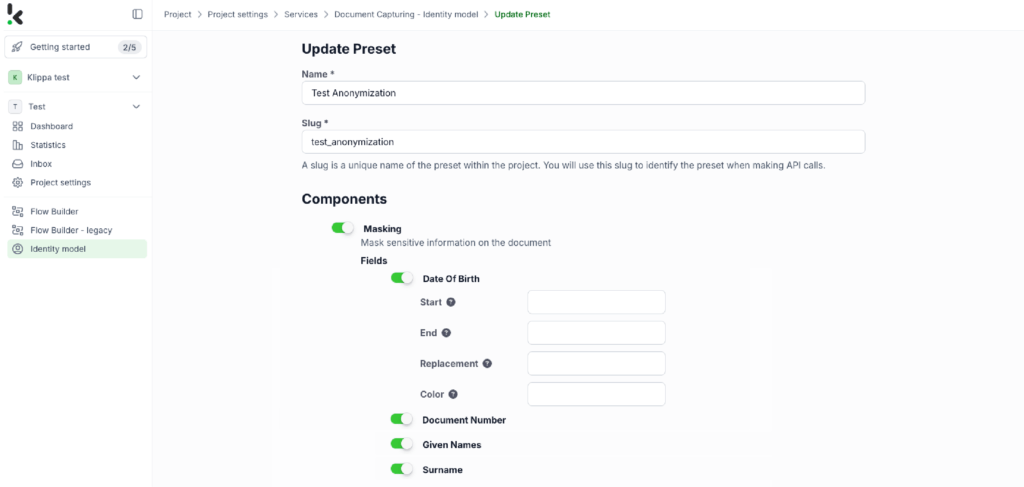
Once activated, you can create a new preset. In this case, we name it “Test Anonymization”. With this preset, you can enable the masking component to anonymize specific fields in your chosen documents. For example, you can anonymize details such as date of birth, document number, or names.
Here’s how the masking process works:
- Start: Enter the starting point of the value you want to mask. Leave it blank to start masking from the beginning.
- End: Enter the endpoint of the value you want to mask. Leave it blank to mask until the end.
- Replacement: Use the replacement field to specify a character that will replace text in the API output.
- Color: You can choose a color for the mask on the image. The default is white, but you can choose any color.
If all fields are left empty, then the default settings will apply, which makes anonymization flexible and easy to customize.

You’re almost ready! Suppose you want to fully automate the process of taking documents from a folder, processing them through the system, and storing the results automatically. In that case, you’ll need to follow a few more steps.
To handle bulk operations, it’s time to use the Flow Builder.
Step 3: Select your input source
Let’s go back to the services interface and choose the Flow Builder. There you can create a New Flow and give it a name. In this case, we’ll name it “Anonymization”.
To anonymize documents, start by selecting your input source. You can upload files directly from your device or connect to over 100 external sources like Google Drive, Dropbox, Outlook, Box, Salesforce, Zapier, OneDrive, your company’s database, or even cloud storage solutions like Amazon S3 and iCloud. Ensure all relevant documents are stored in a specific folder so they can be processed in bulk if needed.
For this example, create a folder named “Input” in Google Drive and upload your identity documents there.
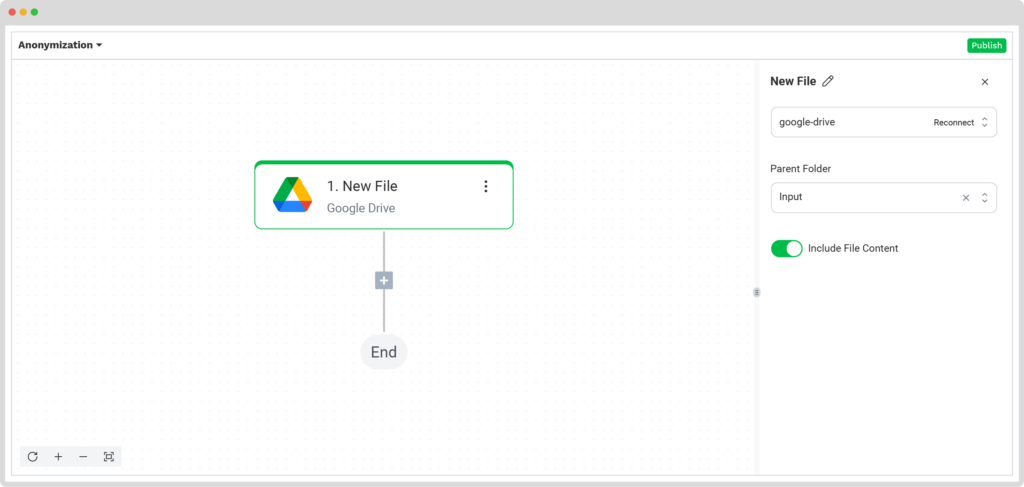
After that, select your input source by choosing “Google Drive” → “New File” as your trigger. On the right side, complete the following sections:
- Connection: You can assign any name to your connection. For example, we named ours “google-drive”. After naming, the system will request you to authenticate with Google.
- Parent Folder: Input
- Include File Content: Check this box to ensure file content is processed.

Step 4: Capture and extract data
For this step, we will use the previously created preset to anonymize all the selected data from all the documents in the input folder. The platform uses Optical Character Recognition (OCR) technology to automatically scan each document and identify the selected sensitive information for anonymization.
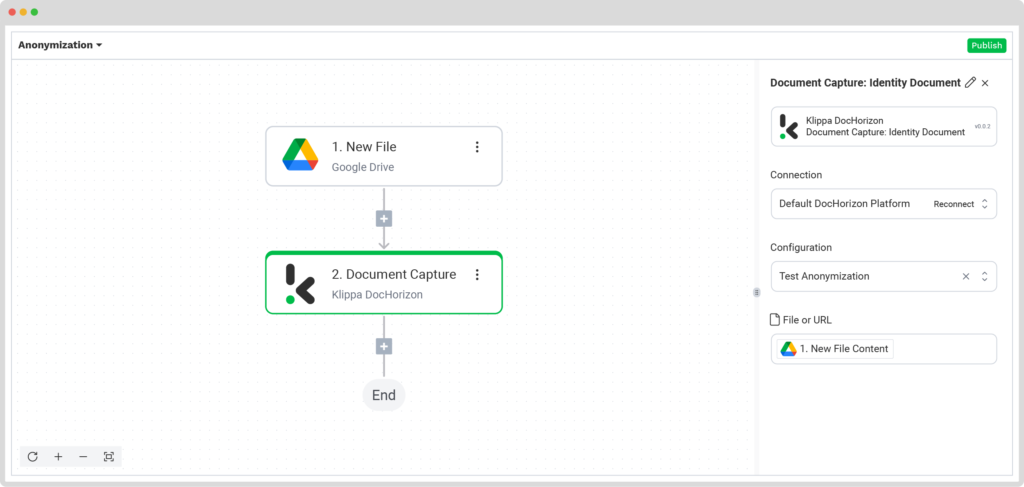
In the Flow Builder, press the + button and choose Document Capture: Identity Document.
To proceed, configure the following:
- Connection: Default DocHorizon Platform
- Preset: The name of your preset (in our case “Test Anonymization”)
- File or URL: New file → Content

Step 5: Save the file
Once the anonymization process is complete, you can choose how to handle the results. For example, you can organize them into a Google Drive folder that you’ve already set up, named “Output”.
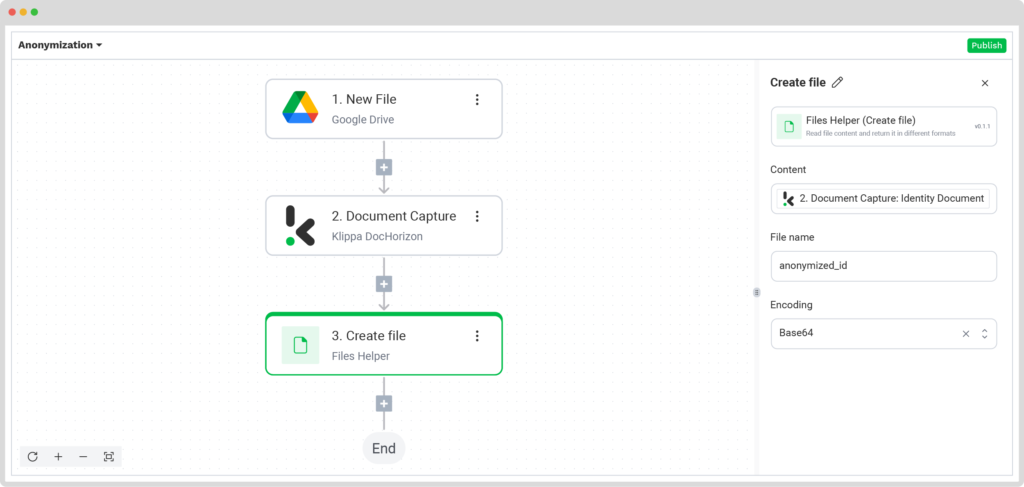
Press the + button and add Create File → Files Helper (This step converts the JSON format of the image into a usable image format).
To proceed, configure the following:
- Content: Components → identity documents → sides → sides[1] (first item) → image (string)
- File Name: anonymized_id
- Encoding: Base64 (The encoding Klippa uses to export the image)

Here’s a tip: You can test this step by downloading the file located in the bottom-left corner of the interface. But that’s optional!
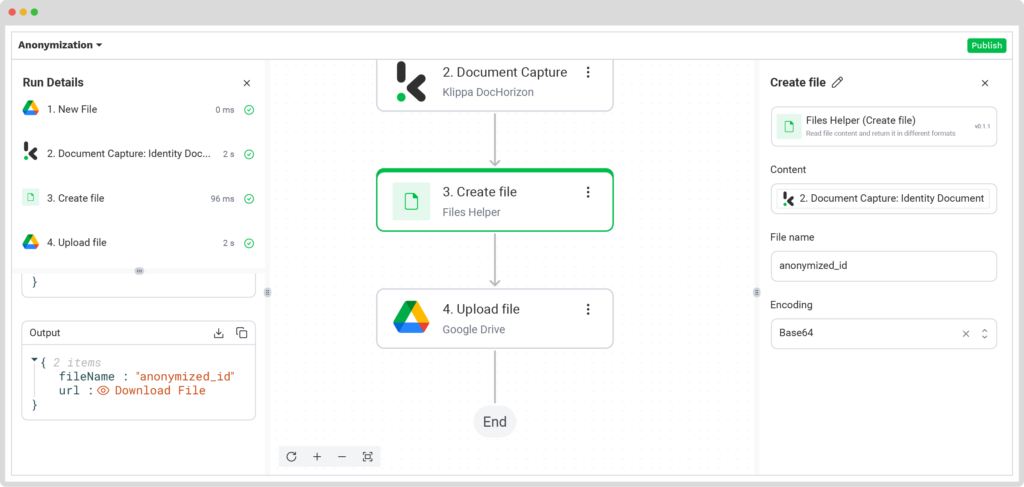

Then, you have to press the + button again and select Upload File. This is where you can find the downloaded documents.
Follow the instructions below:
- Connection: google-drive
- File Name: masked-id → The name of the file you want to export
- File: Create file URL
- Parent Folder: Output → The name of the folder you want the documents to be downloaded to.
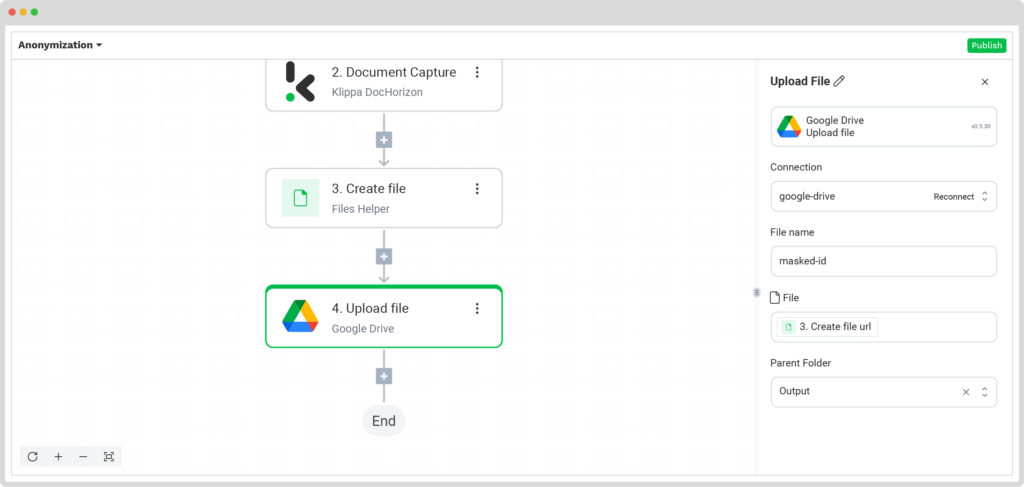

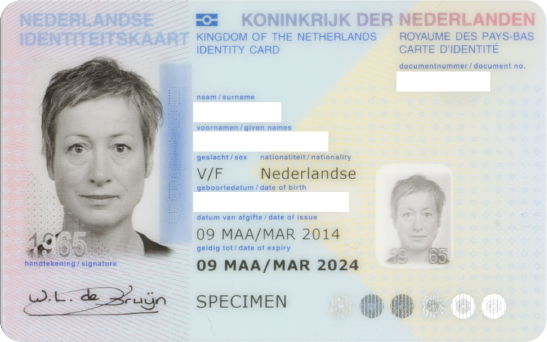
Well done! Now all data is anonymized and you’re good to go. You just need to check your Output folder on Google Drive.
The anonymized documents will have this format:

Why Choose Klippa for Your Bulk Document Anonymization?
Have you decided to take the next step and anonymize your documents in bulk? With our smart anonymization solution, we’ve got you covered.
With Klippa DocHorizon, the procedure is not only easy to implement thanks to our available documentation but it also offers you a wide range of benefits such as reduced costs, retained data utility, faster turnaround times, enabled scalability, and enhanced compliance.
Ready to say no to time-consuming, frustrating manual processes that come with no compliance guarantees? Then fill out the form below for a free demo of our software. If you have any additional questions, feel free to reach out.